Monday, September 27, 2010

Review: Gamescience Dice Part 2

Continued from Part 1:

Now, are they actually balanced?  I did a completely non-scientific study of my dice.  I made 1,000 rolls each on both my old Chessex dice and the new Gamescience dice.  I'm loath to publish my results because they are pretty non-scientific but here they are.  The rolls were made on a hard surface.  I picked 5 dice at random out of my pool for each roll.

Chessex Results:

1:  15.8%
2:  17.4%
3:  18.2%
4:  15.2%
5:  16.5%
6:  16.9%

Average roll:  3.499

1:  15.5%
2:  18.1%
3:  13%
4:  16.3%
5:  19.2%
6:  17.9%

Average roll:  3.594

So it would appear that the Gamescience dice roll higher and the Chessex roll lower but closer to average.  This is where I think my results are flawed.  I don't know enough about probability to say if 1k rolls are enough to really determine an average.  And if the Gamescience dice do indeed roll higher, am I an unethical gamer if I use them and I know they roll higher?  Am I a total nerd if I made 2k rolls to see if my dice really are biased?

In the end most gaming rolls are made on a felt surface.  I probably need to redo the test on a felt gaming board but I really don't feel like doing it again.  Furthermore, when I roll my dice I try and bounce them for best results.  I also own a dice tower and I wonder how the results would be there.  So I don't think I can count these results.  Further tests are needed.

Final Verdict, the Bad:  The sharp corners of Gamescience dice kind of hurt my hands and they're a bit bigger than the usual dice so it's hard to pick up a big handful of them.  The clear non-inked ones are hard to read (if you buy the clear get inked) sometimes.  They're more expensive than Chessex dice and are not sold in bricks.

Final Verdict, the Good:  They don't go bouncing every which way when you roll them or when they fall on the floor.  Also, this will sound really stupid but I feel more confident rolling them, that I know if I get bad dice rolls it's because of probability not because of flaws in my dice.  The greatest plus of all is that if they are truly statistically even, that should outweigh all other considerations.

So for anyone who knows more about probability and statistics than I (which isn't much), I'd appreciate you weighing in.

Friday, September 24, 2010

Review: Gamescience Dice Part 1


For this review, you will need to do some extra reading or it may not make a lot of sense.  About two months ago I bought a set of Gamescience dice after watching this video and this video.  Oh, and while you're at it read this famous thread, this too provides the necessary context.

Have you done all the required reading?  No?  Well here's the summary.  The normal dice you use such as the Chessex and GW dice are flawed because they are tumbled.  The tumbling process removes the mold line but it also causes the dice to favor one side meaning that yes, your dice do hate you.  Dice with straight edges will give you more statistically even results.  Casino dice are the best probably, but they're heavy and super expensive.  Gamescience dice are a good solution, they're way cheaper than casino dice but will roll statistically even.

But seriously, at least go watch the two videos.  It's about 20 minutes total but worth every minute.  The guy is very interesting and explains his case well.  I tested out his claims that normal gaming dice are flawed and he was certainly right on that.  All my D&D dice had horribly uneven surfaces.  My Chessex brick has problems all over when you look up close.

Here lies the tale of my dice.  After watching those two videos I quit using my Chessex brick that I've had since I was 17 in favor of the Gamescience dice.  Did I magically start winning games?  Did I miraculously pull out those sixes when I needed them?  Well...no.  If your dice are average you shouldn't really notice anything.  Not to mention with the laws of probability you will still have bad dice games no matter what dice you use.

Indeed, I still have bad dice games.  My first game of WHFB was the absolute worst dice I've ever had in my life.  I didn't succeed in doing anything (failed all charges, failed all to wounds or if I did they passed their saves, failed to cast anything, miscasted on the first roll, etc) until about turn three or so at which point it was far too late.  I have had good dice rolls (in a later game) in which my champion needed to pass three armor saves at a -1, I rolled two sixes for the armor and then rolled a 6 for his parry save.  However, it's always the really bad and the really good ones that stand out.  We don't remember the average rolls.

In all, I'd say my experiences have been quite average.  For dice that's a good thing.

Now the dice come with a bit of a blemish from the casting, it's similar to a mold marking where it's been cut off the sprue.  The website says to take it off with sandpaper but it didn't work for me, it scratched the surface.  I used a very sharp exacto blade and that took it off just fine.  As I said before, all dice are born with these but since Gamescience dice are not tumbled you have to get rid of it yourself.  It's small enough that it won't affect the roll (it's on the flat surface, not the edge).

They are sold both inked and non-inked.  The non-inked ones are cheaper but you'll have to ink them yourselves.  I used my Micron pens and they worked great.

Coming up on Monday is part 2 in which I reveal the statistic results of the Chessex and Gamescience dice.  Stay tuned!

Monday, September 20, 2010

Review: Battlefoam X-Board Travel Display


I had the chance recently to paint up the Battlefoam X-Board Travel Display.  The image shown above is directly from Battlefoam's website but below is how I painted it.


First, the good.  This is an efficient way to get yourself a tournament display board.  It is modular so you can have the hill in the middle or on the edges.  It packs up into a backpack sized case (included) and when put together it is very sturdy.  

Now the bad.  The texture on the board is rather poor.  If you've ever looked up close at the GW Realm of Battle board, this is nothing like it.  The cliff isn't very realistic.  It can be kind of a pain to put the clips in that hold it together, and it's even more of a pain to take it apart.  Furthermore, the flock rubs off every time you take it out of the bag.  Even if you're careful it still scrapes off the edges.

So if you want a tournament display board but don't want to build your own, I would recommend this.  Even though the texture is rather poor it will be covered up by your models.  As long as you're not constantly taking it in and out of the bag the flock should be fine (I would recommend not flocking the edges though).

Even if you have the gumption to build your own, I would say that this board is a great starting point.  You can certainly add a lot to this board and the fact that it snaps together and apart is a big plus.  While I was painting it I imagined placing ruins on the hills and sculpting a few craters in the flat area.  Of course it may not fit in the bag anymore depending on how you do it.

A few notes on how I painted mine:  I tried to match my client's bases as closely as possible.  The flock is the same that I used on those, I don't like the radioactive green grass I see everywhere.  I tried to go for more natural patches of grass as opposed to a bunch of green blobs.

Wednesday, September 15, 2010

Island of Blood Test Models


I decided to make my first painted Skaven models be the champions from Island of Blood.  It would be a good way to experiment and try to speed up my usual routines since I have eighty of the rats to paint.


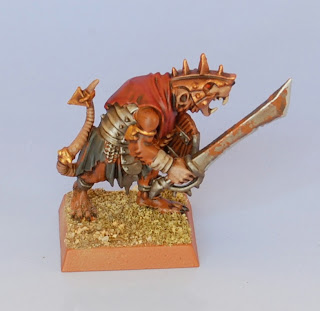
I primed them with the Army Painter Fur Brown.  I then basecoated and did one layer of highlights on the silver metal only.  I then washed the whole thing with Devlan Mud.  Afterwards I highlighted the gold and the bronze.  I picked out the eyes and added the rust on the blade.  It really didn't take that long and it certainly looks like a dirty rat man.


The hardest thing was letting go of my normally meticulous style and making concessions in quality for speed.  But the nice thing about Fantasy is that only the front rank has to look good, the rest just have to look unified.

Monday, September 13, 2010

Frequent Internet Spelling Mistakes: Rouge vs. Rogue

We're back with a very important clarification.  Without further ado, here is a Rouge Trader:


This is Rogue Traders:


Er, wait, this is also Rogue Trader:


Let's not get them mixed up now, shall we?

Tuesday, September 7, 2010

One Island of Blood Complete!


I have built 40 clanrats and I have many, many more to go.  I still have one IoB set to finish and then I'm going to need Skavenslaves so that's even more.  Some of the rats in this set might make good slaves but those shields are pretty stuck on there, and who gives their slaves shields?  They're supposed to die.  I may buy a box of Night Goblins to use as slaves and mix them in the unit.

I have also decided to just keep all my stuff on one blog.  Like Chicago Terrain Factory responded, "Better to have one active blog than two slow ones."  Only 20 people voted in my poll, and I know I have more readers than that but I had a 3/4ths majority on keeping them together.

Also, I'm approaching 100 "followers."  When I hit 100 I need to do some kind of giveaway.

Friday, September 3, 2010

Chipped Metal Tutorial

I got an email from a reader asking me how I did my chipped metal look on the Master of the Ravenwing.


I also used this technique shown in the Stompa yesterday.  It's super easy.  Simply take a piece of foam, for small models use a bit of foam that comes in a blister, for bigger ones you can use a bit of foam from a transport pluck-n-pull or whatever they call them.


Tear it at an angle.  You want it to be a bit jagged but not too much or it will be splotchy.  Test it out on a piece of paper or something first.  Then, just dip it in your paint starting with Boltgun Metal.  Wipe it off on the paint pot so that you don't have too much on the foam.  Then dab it on the edges where metal is likely to chip.  Be sure to rotate and move the foam in different directions or else all the chipping will have the same pattern.  When you're done dab a bit with Chainmail, then a final dabbing of Mithril Silver (each one uses progressively less paint just like a highlight).

By the way, once the paint dries on the foam if you want to reuse it you'll have to tear it anew.  The dried paint drastically affects its absorption and texture.

You can also do rust with this technique but that's already been covered by many others.  I have yet to decide which I prefer but once I figure it out I'll be sure to post about it.

Wednesday, September 1, 2010

Stompa Complete

This wraps up the largest single model I've ever painted.  This was a commission.  The client wanted the arms and head magnetized as well as the deffrolla.  The head was easy enough but those arms are really heavy and the joins are so weedy that I had to use pins.  I don't even think the magnets are holding the arms.  I think it's all on the pins.  The deffrolla isn't magnetized at all and it's heavily trimmed so it would fit in the front.  Technically a Stompa can't take a deffrolla but I do as I'm told.


I used the chipped metal look for the black (as requested, tutorial coming soon).  The client actually wanted me to paint it clean and unweathered but I just couldn't resist.  Chipped metal is still clean.  I wanted to rust the feet and deffrolla but the client wants it to match the rest of his army so that was a no go.  I did use an oil stain weathering powder on the white and other key areas because it really needed something, it looked too plain without it.

This is the first Ork model I've ever painted.  It's hopefully not the last, the Ork style allows me to be more stylistic and even sloppy at times.  I don't have to stress about streaks in my white as the Orks certainly don't care about that.  It's hard to see in the pictures but all the streaks in the white are going the same way so it doesn't look sloppy.

A bit of advice for painting a stompa or similar sized model:  break it down into smaller chunks.  I painted the arms as one model each, the head as one model and finally the body.  This made it so much more manageable.  It's kind of daunting painting something this big but you have to eat a squiggoth one bite at a time.  If it doesn't eat you first.

Related Posts:

Related Posts with Thumbnails