I brought my Nids to 'Ard Boyz this year and though I had to borrow from two different people, I still don't think my list was as tight as I would have liked it. Here's what I took:
Parasite
Doom+Pod
Hive Guard
3xVenomthropes
10 Termagants
Tervigon
10 Termagants
Tervigon
10 Genestealers
3x Spore Mines
3x Spore Mines
30 Gargoyles
Trygon Prime
Tyrannofex
Tyrannofex
Looking back I think I'd rather have another Tervigon and two more Trygons instead of the T-Fex. However, the Gargoyles+Venomthropes is a golden combo. If you string them out right, you can still get the cover save while still moving full distance. The formation looks something like a T.
Anyway, my first game was up against the other Nid player in the store, from whom I borrowed the Venomthropes. He has an all-drop list. He managed to drop a pod of warriors in behind my lines and nearly killed my traitor, but only because he whiffed his rolls pretty bad. I didn't kill his traitor either and got a minor victory. Had he killed mine I would have taken a minor loss.
The second game was up against Orks. Ed from LATCS was running a Battlewagon army. For some reason he put everything except his Lootas in reserve. That sole fact allowed me to win the game. I advanced with everything and on his turn two realized there's no point in going after his objective as it was only worth one point as opposed to the other quarters which were worth two. Ed's army came in piecemeal but even then I couldn't stop all his battlewagons. I don't think I killed a single one. However, I did slow him down. His Lootas were also on fire, rolling a 3 on their D3 every time and hitting well over 50% of the time each time they shot. They took out my Hive Guard, put 5 wounds on a T-Fex and killed a Tervigon. We only got to turn 4 (two horde armies will do that to you) and I held my objective plus the center one while contesting his. If he had started on the board there's no way I could have stopped him in time. That netted me a massacre, however if the game had gone on I'm sure I would have lost.
The third game was against Chaos. The game was pretty rough and tumble and I had a hard time killing his vehicles. I may have killed one. I immobilized his Land Raider with a lucky hit from a Broodlord but couldn't finish it off. He killed a lot of my stuff and I got a minor loss.
In the end I took third. I ordered a Ruins of Osgiliath terrain piece as it's a cool piece and could be used in Fantasy or 40k, plus Mordheim.
I learned that I'd rather have the extra Trygons and another Tervigon as my HQ. I also learned that I'm going to need at least two more boxes of Termagants, not to mention at least two boxes more if I get the third Tervigon.
Showing posts with label Battle Reports. Show all posts
Showing posts with label Battle Reports. Show all posts
Monday, August 29, 2011


Monday, May 23, 2011
'Ard Boyz Semi Finals Results
I went down to GMI games in Riverside for the 'Ard Boyz Semifinals. Here's my list and how the games went.
Grey Seer on Bell
Grey Seer on foot
BSB
Plague Priest with Furnace
Engineer with Doomrocket
45 Clanrats with PWM
30 Stormvermin with WFT
10 Stormvermin with WFT
50 Slaves
5 Gutter Runners with poisoned slings
5 Gutter Runners with poisoned slings
HPA
HPA
My first game was against Daemons. He had Fateweaver, a big block of horrors and a big block of bloodletters, plus two units of flamers. I have never played against Daemons before and my opponent was really cool and helped explain what everything was and even offered me useful advice on what to do. With the wonky Kill Points in the scenario I was massacred, but if it had been victory points the game would have been a tie.
All win/losses in that round were Massacre/Massacred. The kill points saw to that as giving up 8 for a rare choice is ridiculous.
I was against Warriors of Chaos for the second round. My opponent only had two level 2 wizards, plus Archaeon. We advanced and I had him tabled by turn three thanks to my magic and shooting running amok. I grabbed the Fanatic on the first turn with my Slaves and passed my strength test. They spent the rest of the game getting away from the action. He was a pretty cool guy as well and I learned that Warshrines are nice if you roll well. I got a Massacre with full battle points.
For round three I was on table three. Have a look at what my opponent brought:
Yes, that is a cardboard tube representing the Folding Fortress. It doesn't even have a roof. My opponent told me that it has 10 stories. He said he was going to make it 12 stories but he didn't want to be cheesy. I wish I was making that up. This is sketchy rules wise, as the Fortress says it has to be the same size as a Watchtower building, or a similar scratch-built structure. This is scratch built but it's twice as high as a Watchtower.
His army had 148 Skinks plus a dozen heroes in the tower with two Slann, both with Becalming Cogitation. They had poisoned Javelins and the flaming banner. He also had the dagger that causes Fear in Skaven. Then he had four Stegadons outside the tower. His whole plan was, "Come at me bro."
I considered holding back and simply playing for the draw. However, I had to get a massacre if I wanted to place so I decided to try and destroy the building either via Crack's Call or the Bell. If I could destroy the building I would probably win by a landslide. If I couldn't destroy the building I was in for a world of hurt.
I advanced everything and after turn 1 I seriously considered turning back and simply playing to a draw. I decided to persevere, weathering the dwellers and the fiery darts of the adversary. Turn two I rolled a 14 on the Bell and my hopes went up but I failed to destroy the building as I rolled a 3. On turn three I rolled a 14 again and this time rolled a 6! The fortress went crumbling down and killed both Slann and 1/3 of the skinks. That still left a sizable amount, even after getting doomrocketed.
At this point it took us about an hour to determine how to place the unit. The Skaven FAQ clears it up but he insisted on being within 1" of my models. The confusing thing was that I had charged them with my Furnace but we decided that they were not in combat because they have to abandon the building which would remove them from combat. It was a really sticky rules situation.
At that point the game took a major turn for the sour. After disagreeing strongly on issues for about an hour everything was tense after that. Because we had taken so long to decide what happened we only got to turn 4. I didn't break his big unit so I wasn't able to get a massacre. I got a major victory and got 6th place.
If I had charged the HPA into the Skinks I may have broken his unit, come to think about it now as I look at the picture below. That's how they came out of the building. Hindsight is always 20/20. Furthermore if he had a proper watchtower I would have had A LOT more models alive.
*To be sung (spoken) in the voice of Fred Schneider from the B-52s if that wasn't clear.
Grey Seer on Bell
Grey Seer on foot
BSB
Plague Priest with Furnace
Engineer with Doomrocket
45 Clanrats with PWM
30 Stormvermin with WFT
10 Stormvermin with WFT
50 Slaves
5 Gutter Runners with poisoned slings
5 Gutter Runners with poisoned slings
HPA
HPA
My first game was against Daemons. He had Fateweaver, a big block of horrors and a big block of bloodletters, plus two units of flamers. I have never played against Daemons before and my opponent was really cool and helped explain what everything was and even offered me useful advice on what to do. With the wonky Kill Points in the scenario I was massacred, but if it had been victory points the game would have been a tie.
All win/losses in that round were Massacre/Massacred. The kill points saw to that as giving up 8 for a rare choice is ridiculous.
I was against Warriors of Chaos for the second round. My opponent only had two level 2 wizards, plus Archaeon. We advanced and I had him tabled by turn three thanks to my magic and shooting running amok. I grabbed the Fanatic on the first turn with my Slaves and passed my strength test. They spent the rest of the game getting away from the action. He was a pretty cool guy as well and I learned that Warshrines are nice if you roll well. I got a Massacre with full battle points.
For round three I was on table three. Have a look at what my opponent brought:
 |
| I've got me a tower, it seats about infinity so hurry up and bring your Slann Shack money! * |
His army had 148 Skinks plus a dozen heroes in the tower with two Slann, both with Becalming Cogitation. They had poisoned Javelins and the flaming banner. He also had the dagger that causes Fear in Skaven. Then he had four Stegadons outside the tower. His whole plan was, "Come at me bro."
I considered holding back and simply playing for the draw. However, I had to get a massacre if I wanted to place so I decided to try and destroy the building either via Crack's Call or the Bell. If I could destroy the building I would probably win by a landslide. If I couldn't destroy the building I was in for a world of hurt.
I advanced everything and after turn 1 I seriously considered turning back and simply playing to a draw. I decided to persevere, weathering the dwellers and the fiery darts of the adversary. Turn two I rolled a 14 on the Bell and my hopes went up but I failed to destroy the building as I rolled a 3. On turn three I rolled a 14 again and this time rolled a 6! The fortress went crumbling down and killed both Slann and 1/3 of the skinks. That still left a sizable amount, even after getting doomrocketed.
At this point it took us about an hour to determine how to place the unit. The Skaven FAQ clears it up but he insisted on being within 1" of my models. The confusing thing was that I had charged them with my Furnace but we decided that they were not in combat because they have to abandon the building which would remove them from combat. It was a really sticky rules situation.
At that point the game took a major turn for the sour. After disagreeing strongly on issues for about an hour everything was tense after that. Because we had taken so long to decide what happened we only got to turn 4. I didn't break his big unit so I wasn't able to get a massacre. I got a major victory and got 6th place.
If I had charged the HPA into the Skinks I may have broken his unit, come to think about it now as I look at the picture below. That's how they came out of the building. Hindsight is always 20/20. Furthermore if he had a proper watchtower I would have had A LOT more models alive.
 |
| I got me a Slann Shack, it's full of fail and it just set sail!* |
*To be sung (spoken) in the voice of Fred Schneider from the B-52s if that wasn't clear.
Sunday, April 17, 2011
Fantasy 'Ard Boyz Report!
On Saturday I played in the Fantasy 'Ard Boyz tournament. Here's my list:
Grey Seer on Bell, Potion of Toughness
Grey Seer, Power Scroll, Foul Pendant
Chieftain BSB, Enchanted Shield, 4+ ward save
Engineer w/ Doomrocket
Plague Priest on Furnace, Plague Censer, Shadow Magnet Trinket, Dragonbane Gem
50 Clanrats
50 Slaves
50 Slaves
30 Stormvermin (Storm Banner)
40 Plague Monks (Plague Banner)
5 Gutter Runners (slings and poison)
HPA
HPA
Doomwheel
I wanted to take a third HPA but I don't have the model. The Doomwheel has always performed well for me despite what the Internet says, even though in the second game it nearly killed my HPA (he passed all his Regen saves). I took some advice from Rhellion and improved my original list. I disregarded some advice to mixed results. I took the plague censer and though it did put a wound on an big goblin spider thing, I don't think it's worth it. I didn't take warpstone spikes on the HPAs and it would have come in a lot of use in the first game. This list was unusual for me in that it has very little shooting. I did that because of the wonky scenarios.
During the course of the games, my plague furnace got charged by a lone pegasus Paladin with Heroic Killing Blow. He only hit once, and of course rolled a 6 to wound, taking it out in one shot. The Monks then pounded him into the ground in revenge, following through to a unit of bowmen, wiping them out, then charging into more knights, but the game ended before we could see the results. My Monks also took out an Arachnarok spider in one round. I never managed to get the 13th spell off, my power dice were always really low. The one time I tried, I used the Power Scroll and rolled a perfect straight which still meets the casting value, but it was dispelled.
Now it's on to the semis, I am going to re-evaluate my list and work in a frenzy this next month to get ready.
Grey Seer on Bell, Potion of Toughness
Grey Seer, Power Scroll, Foul Pendant
Chieftain BSB, Enchanted Shield, 4+ ward save
Engineer w/ Doomrocket
Plague Priest on Furnace, Plague Censer, Shadow Magnet Trinket, Dragonbane Gem
50 Clanrats
50 Slaves
50 Slaves
30 Stormvermin (Storm Banner)
40 Plague Monks (Plague Banner)
5 Gutter Runners (slings and poison)
HPA
HPA
Doomwheel
I wanted to take a third HPA but I don't have the model. The Doomwheel has always performed well for me despite what the Internet says, even though in the second game it nearly killed my HPA (he passed all his Regen saves). I took some advice from Rhellion and improved my original list. I disregarded some advice to mixed results. I took the plague censer and though it did put a wound on an big goblin spider thing, I don't think it's worth it. I didn't take warpstone spikes on the HPAs and it would have come in a lot of use in the first game. This list was unusual for me in that it has very little shooting. I did that because of the wonky scenarios.
During the course of the games, my plague furnace got charged by a lone pegasus Paladin with Heroic Killing Blow. He only hit once, and of course rolled a 6 to wound, taking it out in one shot. The Monks then pounded him into the ground in revenge, following through to a unit of bowmen, wiping them out, then charging into more knights, but the game ended before we could see the results. My Monks also took out an Arachnarok spider in one round. I never managed to get the 13th spell off, my power dice were always really low. The one time I tried, I used the Power Scroll and rolled a perfect straight which still meets the casting value, but it was dispelled.
Now it's on to the semis, I am going to re-evaluate my list and work in a frenzy this next month to get ready.
Friday, April 9, 2010
My Footdar Battle Results Are Flawed!
I asked my opponent to give me his list so I could include it in the Battle Report, and it turns out he had an extra heavy weapons team that he didn't mean to include! That weapons team inflicted two wounds on the Avatar and he was killed by exactly two more wounds from small arms fire in that same shooting phase- so the game might have gone a little differently. I would have still lost I'm sure, but it wouldn't have been as much of a rout. Or maybe the Avatar would have still died as ignominious a death due to flashlights or something. So we're going to have to rematch if I want scientific accuracy, but I really don't want to play that list again. It is no fun. I love zipping jetbikes and skimmers around, not slogging hordes of guys that are not meant to be in hordes. I like rolling shooting and close combat attacks, not rolling tons of 5+ saves, even fortuned ones.
My list is an exact copy of Mr. Robbins' list, found here. My opponent's list, as he gave it to me:
HQ
Company Command
Plasma Gun
bolter
Vox Caster
Heavy Bolter
5 Grey knight termies
psychic hood
TROOPS
Platoon1
Command Squad 1
flamer
Bolter
flamer
Chimera
Infantry Squad 1
Grenade Launcher
Vox Caster
Missile Launcher
Infantry Squad 2
Grenade Launcher
Missile Launcher
Commissar
Power weapons
Veterans
Plasma Gun
Plasma Gun
Plasma Gun
Chimera
Vox Caster
Veterans
Melta Gun
Melta Gun
Melta Gun
Chimera
Flamer
h. Stubber
ELITES
snipers (10pts each)
Marbo
HEAVY S.
Leman Russ Tank 1
Lascannon
sponson Bolters
Leman Russ Vanq
Lascannon
sponson Bolters
Leman Russ Tank 2
Lascannon
sponson Bolters
FAST ATTACK
Valkyrie
Flame tank
Total: 1999
Plus one bonus lascannon heavy weapons team.
I'm not going to write a full battle report here, just show my pictures and explain my choices and what happened.
 25% terrain.
 My deployment. I had to keep the wraithlords babysat by my only two psykers. I chose to deploy first as I knew I would take a lot of damage from going second, so I didn't know where to put my Dragons and Harlequins. I stuck them in the middle. By the way, I had to proxy quite a few things so the Banshees are harlequins, and every other aspect warrior is a Dire Avenger. The termagants are also Avengers. I forgot my Eldrad model at home so I used a Spore Mine.
 My opponent lined up opposite. He infiltrated two squads of Ratlings in either building.
 This deployment is looking just like Fantasy! While writing this I just realized that I forgot to do Eldrad's redeployment thing. Whoops! Now I really have to rematch because that might have changed things quite a bit.
 On my first turn my guns all had such a short range that I really just ran forward and couldn't shoot.
 On his first turn, I had to take a ridiculous number of saves. Above is my actual roll for taking nine 5+ saves at one point. I still suffered heavy casualties.
 My avengers advanced on the other flank and took out the "bonus" squad. This side of the field was really boring.
 The Gray Knights killed some Dire Avengers and then some guardians. That's an understatement. They wiped out both units. I killed them with some return fire from Wraithlords.
 By the way, during the course of the game I failed three stupidity checks for my Wraithlords once my Spirit Seer got ganked. I couldn't get all of them within 6" of Eldrad.
 My Harlequins actually did pretty well. It took them three turns to get into close combat where they wiped out a 20-man Guard squad. And then they got completely and utterly shot to pieces.

In the end this was the last unit I had remaining. A unit of Dire Avengers in a building. They were safe for now, but only because the Vanquisher had been missing its shots all game.
So! This list sucks. The Wraithlords became a liability as there's only three, so there's only so much they can do, especially when they fail stupidity checks because they have to be babysat. Plus all three were killed by rending shots from stupid Ratlings. They're Hobbits IN SPAAAAAACE! The Fire Dragons need a ride because 18" is not long range. Guardians have too short a range to do anything before they get completely shot up, even with Fortune and Conceal. Eldar are too expensive for hordes. I will try this one more time making sure I use Eldrad's special rule but I doubt it will go better.
My list is an exact copy of Mr. Robbins' list, found here. My opponent's list, as he gave it to me:
HQ
Company Command
Plasma Gun
bolter
Vox Caster
Heavy Bolter
5 Grey knight termies
psychic hood
TROOPS
Platoon1
Command Squad 1
flamer
Bolter
flamer
Chimera
Infantry Squad 1
Grenade Launcher
Vox Caster
Missile Launcher
Infantry Squad 2
Grenade Launcher
Missile Launcher
Commissar
Power weapons
Veterans
Plasma Gun
Plasma Gun
Plasma Gun
Chimera
Vox Caster
Veterans
Melta Gun
Melta Gun
Melta Gun
Chimera
Flamer
h. Stubber
ELITES
snipers (10pts each)
Marbo
HEAVY S.
Leman Russ Tank 1
Lascannon
sponson Bolters
Leman Russ Vanq
Lascannon
sponson Bolters
Leman Russ Tank 2
Lascannon
sponson Bolters
FAST ATTACK
Valkyrie
Flame tank
Total: 1999
Plus one bonus lascannon heavy weapons team.
I'm not going to write a full battle report here, just show my pictures and explain my choices and what happened.
25% terrain. My deployment. I had to keep the wraithlords babysat by my only two psykers. I chose to deploy first as I knew I would take a lot of damage from going second, so I didn't know where to put my Dragons and Harlequins. I stuck them in the middle. By the way, I had to proxy quite a few things so the Banshees are harlequins, and every other aspect warrior is a Dire Avenger. The termagants are also Avengers. I forgot my Eldrad model at home so I used a Spore Mine.
 My opponent lined up opposite. He infiltrated two squads of Ratlings in either building.
 This deployment is looking just like Fantasy! While writing this I just realized that I forgot to do Eldrad's redeployment thing. Whoops! Now I really have to rematch because that might have changed things quite a bit.
 On my first turn my guns all had such a short range that I really just ran forward and couldn't shoot.
 On his first turn, I had to take a ridiculous number of saves. Above is my actual roll for taking nine 5+ saves at one point. I still suffered heavy casualties.
 My avengers advanced on the other flank and took out the "bonus" squad. This side of the field was really boring.
 The Gray Knights killed some Dire Avengers and then some guardians. That's an understatement. They wiped out both units. I killed them with some return fire from Wraithlords.
 By the way, during the course of the game I failed three stupidity checks for my Wraithlords once my Spirit Seer got ganked. I couldn't get all of them within 6" of Eldrad.
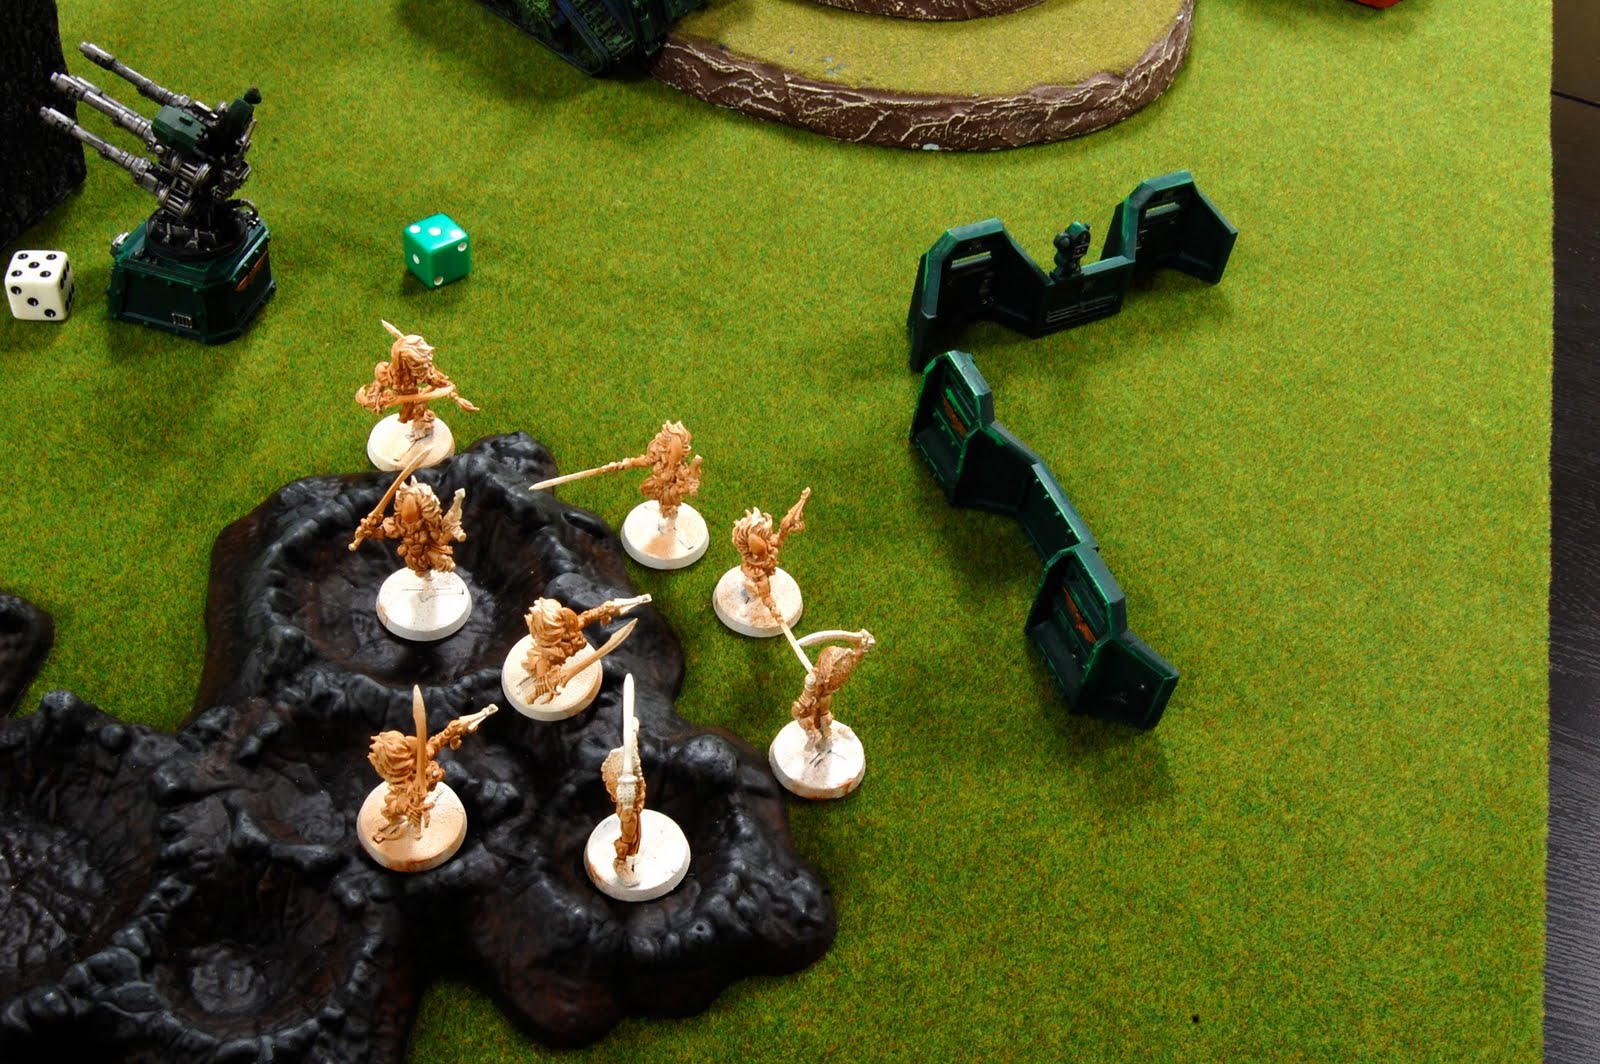 My Harlequins actually did pretty well. It took them three turns to get into close combat where they wiped out a 20-man Guard squad. And then they got completely and utterly shot to pieces.
In the end this was the last unit I had remaining. A unit of Dire Avengers in a building. They were safe for now, but only because the Vanquisher had been missing its shots all game.
So! This list sucks. The Wraithlords became a liability as there's only three, so there's only so much they can do, especially when they fail stupidity checks because they have to be babysat. Plus all three were killed by rending shots from stupid Ratlings. They're Hobbits IN SPAAAAAACE! The Fire Dragons need a ride because 18" is not long range. Guardians have too short a range to do anything before they get completely shot up, even with Fortune and Conceal. Eldar are too expensive for hordes. I will try this one more time making sure I use Eldrad's special rule but I doubt it will go better.
Sunday, September 13, 2009
Eldar Defense in Planetstrike
I finally got around to playing my first Planetstrike game. It was a lot of fun. I really like the Attacker/Defender dynamic. Here's the defense I employed. Please ignore the bright, colorful blocks. My daughter loaned them to me for this game because I was one bastion short. I was very eager for it to be destroyed.

As you can see, I went with a Helm's Deep style defense. The idea is that if they attack the front, they're exposed to fire from all bastions. If they try and take the sides, they can only get the first two, and then they'll be slowed down. I filled the spaces between bastions with obstacles to mess up any deep strikers.
I deployed my Dark Reapers in the center bastion so they could get the best line of fire. I put a Wraithlord in each of the forward bastions, and a squad of Wraithguard in the right bastion, and some Dire Avengers in the left one. I had some Pathfinders out behind the Aegis Defense Line for extra firepower.
When playing Planetstrike, make sure you follow the order of events properly. I figured I knew them so I didn't and deployed too early. The order is there for a reason!
 An imposing view for an attacker.

My opponent took to the flank. Fortunately, I was able to slow him down enough that he only had two objectives. At one point he had 3 but I was able to clear the attackers from it. If the game had ended on turn 5, it would have been a draw. However, the game ended on turn 7 and I won with three objectives to two.
I'm not sure who my star unit was. All my units did really well. The Wraithguard absorbed a huge amount of firepower and my opponent stayed away from them out of fear. While they have a short range, Wraithcannons are very nasty. I only had 3 of 10 survive the game, but that was all I needed. The reapers did well, and after spending 3 turns repositioning my Pathfinders, they actually managed to do some damage.

In all it was an enjoyable game. Next time I play defender, I am going to try a spread out defense and use my speed to take care of objectives as needed.

As you can see, I went with a Helm's Deep style defense. The idea is that if they attack the front, they're exposed to fire from all bastions. If they try and take the sides, they can only get the first two, and then they'll be slowed down. I filled the spaces between bastions with obstacles to mess up any deep strikers.
I deployed my Dark Reapers in the center bastion so they could get the best line of fire. I put a Wraithlord in each of the forward bastions, and a squad of Wraithguard in the right bastion, and some Dire Avengers in the left one. I had some Pathfinders out behind the Aegis Defense Line for extra firepower.
When playing Planetstrike, make sure you follow the order of events properly. I figured I knew them so I didn't and deployed too early. The order is there for a reason!
 An imposing view for an attacker.
My opponent took to the flank. Fortunately, I was able to slow him down enough that he only had two objectives. At one point he had 3 but I was able to clear the attackers from it. If the game had ended on turn 5, it would have been a draw. However, the game ended on turn 7 and I won with three objectives to two.
I'm not sure who my star unit was. All my units did really well. The Wraithguard absorbed a huge amount of firepower and my opponent stayed away from them out of fear. While they have a short range, Wraithcannons are very nasty. I only had 3 of 10 survive the game, but that was all I needed. The reapers did well, and after spending 3 turns repositioning my Pathfinders, they actually managed to do some damage.

In all it was an enjoyable game. Next time I play defender, I am going to try a spread out defense and use my speed to take care of objectives as needed.
Friday, June 5, 2009
Small Game Recap
So last night turns out that the store does have some bigger tables. Furthermore, they are expanding in a couple of months and they'll have even bigger tables there. We played on a 5x3.5 table. Being a 500 point game it was quite open. Here's what I took and what he took:
Space Marines
5x Scouts
10x Marines
1 Chaplain
1 Thunderfire Cannon
Eldar
10 Dire Avengers
3 Jetbikes
1 Farseer + doom
6 Banshees
1 D-Cannon
I took the D cannon because I figured that on a small table the limited range would not be an issue. As it was, I never got to fire a shot because he stayed out of range and destroyed it around the 4th turn with a Thunderfire Cannon shot. It did keep a bit of firepower off my troops though. I think I can use them as area denial since no one wants to come near one.
His Thunderfire cannon did the most damage of everything he had, it killed 3 banshees, an Avenger, and took out the D cannon. I tried taking it out with my bikes, but it's a tough nut to crack with a 3+ cover save thanks to the Techmarine. A little more firepower would help.
My banshees suffered some really bad rolls and didn't kill too much. They were wiped out by the Chaplain. When I charged the combat squad led by the chaplain, only one banshee actually managed to hit, and of course failed to wound.
In all, I won 3 objectives to 1 (my Avengers formed a long line that touched two objectives while the bikes held the third). I think what did it for me was I have learned that giving up a turn of shooting in order to get a better position pays off a lot better in the long run. In a small game every unit counts, and I think I was better able to maximize what my units did.
Next game we play we're upping it to 1,000 points. I will be playing as Tyranids. This should be interesting because the smaller the game, the harder time Tyranids have because Synapse becomes an issue.
Now we're working on strengthening the 40k community in this area. With the Northridge store closing and the stores in Santa Clarita closing, this is the only place to game in the valley. There's a small club at the college that says I can't play with them because I'm not a student (for insurance reasons, blah blah blah) but we can try and steal their players and get a league going. There's more players out here, finding who they are and getting them out will help us to get a strong wargaming community our here.
Space Marines
5x Scouts
10x Marines
1 Chaplain
1 Thunderfire Cannon
Eldar
10 Dire Avengers
3 Jetbikes
1 Farseer + doom
6 Banshees
1 D-Cannon
I took the D cannon because I figured that on a small table the limited range would not be an issue. As it was, I never got to fire a shot because he stayed out of range and destroyed it around the 4th turn with a Thunderfire Cannon shot. It did keep a bit of firepower off my troops though. I think I can use them as area denial since no one wants to come near one.
His Thunderfire cannon did the most damage of everything he had, it killed 3 banshees, an Avenger, and took out the D cannon. I tried taking it out with my bikes, but it's a tough nut to crack with a 3+ cover save thanks to the Techmarine. A little more firepower would help.
My banshees suffered some really bad rolls and didn't kill too much. They were wiped out by the Chaplain. When I charged the combat squad led by the chaplain, only one banshee actually managed to hit, and of course failed to wound.
In all, I won 3 objectives to 1 (my Avengers formed a long line that touched two objectives while the bikes held the third). I think what did it for me was I have learned that giving up a turn of shooting in order to get a better position pays off a lot better in the long run. In a small game every unit counts, and I think I was better able to maximize what my units did.
Next game we play we're upping it to 1,000 points. I will be playing as Tyranids. This should be interesting because the smaller the game, the harder time Tyranids have because Synapse becomes an issue.
Now we're working on strengthening the 40k community in this area. With the Northridge store closing and the stores in Santa Clarita closing, this is the only place to game in the valley. There's a small club at the college that says I can't play with them because I'm not a student (for insurance reasons, blah blah blah) but we can try and steal their players and get a league going. There's more players out here, finding who they are and getting them out will help us to get a strong wargaming community our here.
Sunday, May 3, 2009
Post-Apocalypse Thoughts
Yesterday's game was a lot of fun. While I wait for my friend to give me the pictures, here's a recap and thoughts on how various units and strategies performed.
First off, my Cobra: It did exactly how I thought it would. Devastated a lot of things on the first turn, and spent the rest of the game with weapon shaken results. On the first turn it took two structure points off a Hellhammer, took a structure point off a Warhound Titan and exploded a nearby bunker, exposing the troops within. For the rest of the game my opponents concentrated their firepower on it, but a combination of holo-fields and cover saves (from a nearby Tower of Tzeentch) kept it from losing any structure points, though it did take a lot of driver stunned/weapon shaken results.
The Revenant Titan: On the first turn destroyed a Vindicator squadron that was threatening a nearby bunker. It is a devastating formation and I decided that it should go away quickly. It took some shots, but the holo-fields really saved the day. I did lose one structure point and had a couple of weapon shaken results.
Shining Spears: They attacked some terminators, but even after two rounds of charges (hit and run) couldn't kill all 5. They just don't have enough attacks, and their extra toughness and armor save just aren't enough to stop powerfists. They are pure Marine killers (who have to be in the open as Spears don't have grenades).
Windrider Host: Due to a Disruptor Beacon, they were quite scattered but took a backline objective. I wasn't going to take the formation because it is really expensive for not getting too much, but as objective claimers they're excellent.
Fire Dragons: In one round of shooting, they took out a Baneblade without even needing to charge in with Meltabombs (3 died in the explosion). They survived a lot longer than I thought, even with a marine squad double tapping and a squad of terminators pumping them full of depleted uranium. They all died eventually, but wiped out more than their points cost. Their Wave Serpent lost its weapons, but survived the game and took an objective.
Howling Banshees: Led by Jain Zar, once they moved the distance to charge a squad of marines (the same squad that nearly wiped out the Fire Dragons) my opponent simply removed the marines without bothering to roll. How's that for reputation?
Genestealers: Did well, Feeder Tendrils on a Broodlord gets the whole unit twice as deadly. If Flesh Hooks and Acid Maw could be taken on the same unit, you would have a unit who could reroll to hit and to wound. With rending, that becomes extra deadly. Unfortunately to do that you have to lose Flesh Hooks, which is very much required.
Malanthrope: For some reason was a big target. It's tough for a husky floater like him to get a cover save, and he took a lot of shots. His supporting Carnifex did well, the extra wound was very helpful. The other fex got taken down by a powerfist rather quickly.
A couple of words on the strategic asset Disruptor Beacon: This changed the game entirely. My ally had the Chaos Conclave which makes all members of the Conclave have a Disruptor Beacon, and my opponents took one and placed it in the center of the board. Since no objectives were in the corners, both sides were throwing reserves into the forested corners. They rapidly became hotspots of combat, but all of it was meaningless as no one could reach any objectives.
Memorable points in the game: The Hellhammer's apocalyptic explosion which immobilized a nearby Warhound Titan, the Dragons cooking a Baneblade, and the surprising appearance of 5 scratch-built Lightning Fighters. When those appeared they used the Precision Strike asset, firing all their missles and weapons at the Cobra. That's 20 missiles, 10 twin-linked autocannons, and 5 lascannons for those of you keeping score at home. Furthermore, a couple of devastator squads joined in the fun of getting a 2+ to hit on my Cobra. Because part of the time it was shielded by a Silver Tower of Tzeentch (which blew up after just a couple shots) the Cobra survived the entire thing unharmed. Granted, it couldn't move or shoot, but no structure points were gone and no weapon destroyed. On the next turn because it got neither a holo-field save nor a cover save it lost the D-cannon. I tried to repair it the next turn but failed. Finally, the last memorable moment was when my Banshees had to take 9 cover saves against a Vulcan Mega-Bolter. I passed all 9. I will admit it, the dice were with me this game. I rolled lots of chain reactions and made lots of saves.
Pictures coming soon!
First off, my Cobra: It did exactly how I thought it would. Devastated a lot of things on the first turn, and spent the rest of the game with weapon shaken results. On the first turn it took two structure points off a Hellhammer, took a structure point off a Warhound Titan and exploded a nearby bunker, exposing the troops within. For the rest of the game my opponents concentrated their firepower on it, but a combination of holo-fields and cover saves (from a nearby Tower of Tzeentch) kept it from losing any structure points, though it did take a lot of driver stunned/weapon shaken results.
The Revenant Titan: On the first turn destroyed a Vindicator squadron that was threatening a nearby bunker. It is a devastating formation and I decided that it should go away quickly. It took some shots, but the holo-fields really saved the day. I did lose one structure point and had a couple of weapon shaken results.
Shining Spears: They attacked some terminators, but even after two rounds of charges (hit and run) couldn't kill all 5. They just don't have enough attacks, and their extra toughness and armor save just aren't enough to stop powerfists. They are pure Marine killers (who have to be in the open as Spears don't have grenades).
Windrider Host: Due to a Disruptor Beacon, they were quite scattered but took a backline objective. I wasn't going to take the formation because it is really expensive for not getting too much, but as objective claimers they're excellent.
Fire Dragons: In one round of shooting, they took out a Baneblade without even needing to charge in with Meltabombs (3 died in the explosion). They survived a lot longer than I thought, even with a marine squad double tapping and a squad of terminators pumping them full of depleted uranium. They all died eventually, but wiped out more than their points cost. Their Wave Serpent lost its weapons, but survived the game and took an objective.
Howling Banshees: Led by Jain Zar, once they moved the distance to charge a squad of marines (the same squad that nearly wiped out the Fire Dragons) my opponent simply removed the marines without bothering to roll. How's that for reputation?
Genestealers: Did well, Feeder Tendrils on a Broodlord gets the whole unit twice as deadly. If Flesh Hooks and Acid Maw could be taken on the same unit, you would have a unit who could reroll to hit and to wound. With rending, that becomes extra deadly. Unfortunately to do that you have to lose Flesh Hooks, which is very much required.
Malanthrope: For some reason was a big target. It's tough for a husky floater like him to get a cover save, and he took a lot of shots. His supporting Carnifex did well, the extra wound was very helpful. The other fex got taken down by a powerfist rather quickly.
A couple of words on the strategic asset Disruptor Beacon: This changed the game entirely. My ally had the Chaos Conclave which makes all members of the Conclave have a Disruptor Beacon, and my opponents took one and placed it in the center of the board. Since no objectives were in the corners, both sides were throwing reserves into the forested corners. They rapidly became hotspots of combat, but all of it was meaningless as no one could reach any objectives.
Memorable points in the game: The Hellhammer's apocalyptic explosion which immobilized a nearby Warhound Titan, the Dragons cooking a Baneblade, and the surprising appearance of 5 scratch-built Lightning Fighters. When those appeared they used the Precision Strike asset, firing all their missles and weapons at the Cobra. That's 20 missiles, 10 twin-linked autocannons, and 5 lascannons for those of you keeping score at home. Furthermore, a couple of devastator squads joined in the fun of getting a 2+ to hit on my Cobra. Because part of the time it was shielded by a Silver Tower of Tzeentch (which blew up after just a couple shots) the Cobra survived the entire thing unharmed. Granted, it couldn't move or shoot, but no structure points were gone and no weapon destroyed. On the next turn because it got neither a holo-field save nor a cover save it lost the D-cannon. I tried to repair it the next turn but failed. Finally, the last memorable moment was when my Banshees had to take 9 cover saves against a Vulcan Mega-Bolter. I passed all 9. I will admit it, the dice were with me this game. I rolled lots of chain reactions and made lots of saves.
Pictures coming soon!
Sunday, April 19, 2009
2k Mini Battle Report

Saturday I played a 2k game against my regular Dark Angels opponent. I barely have 2k points of Tyranids (not including Forgeworld) so I really stretched out what I take normally and took some things I probably shouldn't have. I'll discuss those choices later. First off a simple version of my list:
Hive Tyrant w/ TL devourers
2x Tyrant Guard
Broodlord w/ 11 Stealers retinue
6 Tyranid Warriors with Deathspitters, one with a Barbed Strangler
1 Lictor
1 Elite Fex, Talons and Strangler
17 Termagaunts
17 Spinegaunts
11 Genestealers
17 Hormagaunts
4 Ripper Swarms
1 Ravener
3x Bioacid mines
1 Biovore w/ Bioacid
1 Zoanthrope with Synapse and Warp Blast
1 Sniperfex with VC and BS, Spore Cysts (just for fun), Reinforced Chitin
Basically, my list is two Battleforces with a few extras thrown in, as that's all the models I have. If I had them, I'd take at least another Carnifex (I don't want to do Nidzilla) and more gaunts. I normally have great success with this style of list, but I made several modifications just for fun and as an experiment. I put the biovore in for fun as Spore Mines are a blast to play with. I love that even if you miss, you still get something for your trouble. I put spore cysts on the carnifex because I had 5 points to spend and in the past it worked for me, so I thought I'd try that again. It ended up being the biggest mistake of the game.
My opponent took a fully mechanized Dark Angels list, including 2 Landraiders, Belial to make termies scoring, combat squads each in razorbacks, with 4 Landspeeders.
Before the game began we ate some truly epic sandwiches.

This game was Capture and Control, Dawn of War deployment. My wife set up the terrain as usual and decided to leave a lot of open spaces to make the game more challenging. I placed my objective back close to my line, while the Dark Angels placed their objective right on top of the hill, 24" away. An unusual choice, but in order for me to take or contest it I would have to cross a lot of open terrain. Anyone who has played Tyranids will realize that open spaces are far worse for Nids than their opponents. Dark Angels won the roll and elected to receive. I deployed my stealers in cover, and decided to infiltrate the Broodlord in cover in the middle, as the objective was on the right flank, and a leftward outflank would have made him useless.

With no cover I had to screen my units with the spinegaunts, while the termigaunts sat back and guarded my objective. For the first two turns, all shooting was pretty ineffectual. As the armies got closer and closer, I was forced into leaving cover if I wanted a chance to contest his objective. In the end, I made bad choices and played poorly, and my opponent played very well. Only about 1/4 if even that of my army was still alive at the end of turn 5, while at least half of the Dark Angels were still on the field. Yet it still ended in a draw, though had the game gone any longer I might have lost. Capture and Control kind of sucks that way.
(On a side note last game I played as Nids was against Chaos Daemons, and it was also capture and control. He only had 3 models alive by the end of turn 5, but it was still a draw.)
The worst thing I did was give the Carnifex spore cysts. Like I said before, it's a fun choice but in this case a terrible one. My idea was to leave a trail of spore mines to guard the path to the objective (it worked once before) to slow the advance. In reality, they inflicted two wounds on my fex, and one of the other mines got shot and exploded, killing two hormigaunts. The Biovore's mines actually penetrated a Landraider, but rolled a 1 for damage. The fast attack choice mines drifted into the rear of the Vindicator, imobilizing it. Bioacid is really not that great unless it's in big numbers. Perhaps a triple squad of Biovores would have done better. The Ravener didn't do much better, he popped up and then got shot to pieces after trying to crack the rear armor of a Razorback. The Lictor, while fun, failed to do anything to the Vindicator (by the way, if you stun a vehicle so it can't move, you can still attack it in your opponent's Assault phase, had I know that I may have destroyed it).

The way the armies were advancing looks more like a Fantasy game. A lack of terrain will do that to you.

I finally got into grips with him, but I had to suffer some shooting. Tyrant Guard are worth the points, they absorbed a lot of fire.

Here was the final turn of the game. I surrounded my objective with all my gaunts so he couldn't get near enough to contest it. He didn't like that trick, but it's what got me the draw. He killed 18 of them with some shooting, but it wasn't enough.
While the Tyranid codex is good, it is starting to show its age. With the rending nerf, stealers are ridiculously expensive now. Though it wasn't a problem in this game, hormagaunts can't climb ruins, making upper story troops impossible to reach. All gaunts are still too expensive, especially compared with the new Boyz and Guardsmen. Lictors and Raveners are overpriced as well. Zoanthropes need a ridiculous amount of rolls to fire off their offensive psychic power. The only thing that really got buffed were deathspitter-armed warriors.
So now I have to revise my list a bit. I think I'll pick up one of those Tyranid Assault Broods so I can get another couple carnifexes, and so I can take my Tyranids into an Apocalypse size force. I'm not sure what else to get after that, but an Assault Brood is a big start.
Sunday, April 12, 2009
Eldar vs. Dark Angels, 1500 Friendly Game
The real beauty of the Eldar Codex is the sheer number of choices. 11 HQ choices? Yes please. You can't even come close to taking everything in the codex in one game (which you can for Nids). If you want to field an entire army of Jetbikes, you can. If you want to field an army whose lowest toughness is 6 (except for their spiritseers), you can. If you want to go pure assault, you can. Or if you just want to sit back and shoot with devastating firepower, you can. The codex has so many different play styles that when I get tired of Eldar, I find that changing my list up drastically can revitalize the whole game for me. Obviously some builds are much more effective than others, but in a friendly game who cares?
For this game I elected to take a more unusual list. I decided to take things that I don't normally take to change the game up, and throw my regular opponent for a loop. Here's what I took:
Autarch on JB with lance and fusion gun
5 Shining Spears
10 Pathfinders
3x Vibrocannons (with a Embolden Warlock)
19 Guardians w/Starcannon (with an Embolden Warlock)
3 Jetbikes with a Destructor Warlock
Falcon with 6 Harlequins inside
KP: 8
I rarely take Guardians these days. I decided to take them today to be held in reserve, to come in later and claim back end objectives (the jetbikes were also designated in this role, but to claim mid-field objectives). I've never taken Shining Spears, and the plan was to have the Autarch lead them in glorious Marine slaying. I have never taken Vibrocannons either, and thought I'd have some fun with them. I've never taken Harlequins before, and I had to proxy them, but figured I'd run a Clown Car and see how it goes.
My opponent decided to take the Ravenwing. His plan was to match speed for speed, as I normally run a mechanized/jetbike list. His list was (as far as I can remember):
Sammael
8 Bikers led by Interrogator-Chaplain
8 Bikers
8 Bikers
3 Landspeeders with Multi-Meltas (not in a squadron)
3 Attack Bikes (not in a squadron)
KP: 11 (if the speeders and attack bikes were in squadrons it would be 7)
We rolled an annihilation game with a pitched battle deployment.
Eldar won the roll and elected to deploy first and take first turn.
I deployed my Vibro-cannons in a LOS blocking castle (a terrible looking thing but it’s all we got). They don’t need LOS to hit, so I figured I’d keep them safe. The Falcon and Spears were deployed behind them. Since I saw he had Ravenwing I knew I was safe from the biggest blast weapons, so I bunched them up tight. Finally, I placed my Pathfinders on the right in a ruin which ended up being a mistake. The Guardians and Jetbikes were held in reserve.
He deployed his bikes up front, then used his scout move to put his front bikes into cover. The Landspeeders and Attack Bikes were held behind cover. In the bike squadron were the Interrogator-Chaplain and Sammael.
All plans changed when the Dark Angels seized the initiative!
Dark Angels Turn 1
Turn one, Sammael turbo boosted toward the pathfinders, as well as the int-chap bikes. The attack bikes and the Landspeeders sped toward the Falcon, The attack bikes shot 3 multi-meltas at the falcon and scored 1 hit, which I saved with a cover save.
 (Yes that is a cooking pot in the picture. We're working on making better terrain. That pot will some day be the base for a planetary defense laser. I still have to put texture on my gaming table, hence the green felt.)
Eldar turn 1
After moving my Shining Spears forward to engage the Landspeeders, I moved the Falcon swiftly using Star Engines over to the beleaguered Pathfinders. In the shooting phase, I blasted my 3 vibro cannons at the int-chap bikes and slew 2 marines and wounded Sammael twice. In my second mistake of the game, my forward assault contingent (Spears and Autarch) were caught in the open because they destroyed a landspeeder in the shooting phase (thus they couldn’t assault anything since they weren’t in a squadron). Had they assaulted, the unit was big enough that I could have taken down two speeders (maybe). The Pathfinders attempted to wipe out Sammael’s last wound, but ten sniper rounds failed to do anything.
Dark Angels Turn 2
His speeders and bikes saw fast retribution by annihilating the Shining Spear unit down to the Exarch thanks to 5 multi-melta shots. The autarch was hit in this flamestorm but not wounded, as his bad luck with multi-meltas continues (it’s a running gag between us). On the other side of the board, the pathfinders suffered 2 losses from a flamer, while saving many bolter shots. Charging into the ruins, Sammael suffered a wound from dangerous terrain but saved it with his Iron Halo, however a fellow brother was not as lucky.

The retribution was swift. All the Pathfinders were wiped out without a single return casualty. The Eldar position was pretty tenuous, as they found themselves trapped!
Eldar turn 2
I couldn’t believe that I was completely trapped. Normally I’m the fast one. Recovering from the casualties, I destroyed 2 Landspeeders, 2 attack bikes and 1 regular bike. The Autarch, remaining Shining Spear Exarch, Vibro cannons, and reserves marching in (thanks to the Autarch for that one) claim credit for this victory. The Harlequins disembarked and took care of two bikers while losing one of their own.
Dark Angels turn 3
One reserve bike squadron rode on the flank and pulverized the Vibro-Cannon squad. All that was left was one gunner, quaking in his Eldar boots. The subsequent assault claimed two more Marines to Dangerous Terrain tests, but the kill point was earned.
On the other side, the harlequins wiped out all but the Interrogator-Chaplain, after which they safely disengaged, running for the safety of the Falcon.
Eldar Turn 3
The Harlequins embarked on the Falcon, which flew across the battlefield (Thank Vaul for Star Engines) to combat the new threat from the flanking bikers. The jetbikes formed a protective shield to prevent the guardians from being charged. The remaining Exarch charged the last attack bike to claim that killpoint, while the Autarch played cat-and-mouse with the last Landspeeder, failing to kill it as it shrugged off his Fusion Gun, and he couldn’t get a 6 to hit it in close combat. Finally, the Guardian squad killed the Int-Chaplain with a withering hail of Shuriken fire.

Dark Angels Turn 4
Bringing in the last reserve bikers, he surrounded the Autarch. The flanking bikers on my battle line charged into the jetbike squad. The marines took down one jetbike. The jetbikes passed their morale check unfortunately.
In the shooting phase, the Autarch shrugged off a hail of bolter shots, while the Exarch barely avoided getting fried by the last Landspeeder’s multi-melta (it failed to wound). The Autarch survived all the close combat hits from the Ravenwing bikers, only to fall to a powerfist.
Eldar Turn 4
The Shining Spears Exarch, not wanting to be a free killpoint, turboboosted across the field to hide behind a building. This was not an act of cowardice, but a brave and noble move. The Falcon dropped off the Harlies who charged the outflanking bikers. The Guardians consolidated their position and brought the Starcannon around to bear.
The Falcon exploded the last Landspeeder. The harlequins dispatched the remaining bikers, and consolidated into cover. All that was left was one Bike squad.
Dark Angels Turn 5
With only one squad remaining, he decided it was do or die. My opponent turboboosted them towards the foe, hoping to shoot up the harlequins on the next turn.
Eldar Turn 5
Lots of shooting from everything I had took out all but two of the bikers. Finally, the Harlequins sliced down the last two, ending the game via total annihilation.

Final Score: 11 KPs to 3
My thoughts on the game:
Well, I did learn a lot. Shining Spears are a tiny scalpel in an army already full of scalpels. While devastating on the charge (the Exarch alone wiped out 2 attack bikes and crippled a Landspeeder) they are fragile if the enemy can draw LOS to them. Of course, I left them out in the open and not much can survive a face full of melta. The Autarch underperformed. While he took down a Landspeeder, he also died without taking anyone down with him because his lance only works on the charge. I shouldn’t have chased down the speeder.
The Pathfinders however, underperformed. They didn’t inflict a single wound and were wiped out in a single round of shooting/assault. Their deployment was a mistake though. I should have put them in another building that was closer to the enemy. They wouldn’t have had LOS on the first turn, but it’s always better to spend a turn moving to get the perfect shot than to have two rounds of bad shooting.
The Harlequins were amazing. They wiped out three squads of bikes only taking one return casualty. Next time I am going to combine them with a Farseer. In a Falcon, their speed is unstoppable. Star Engines was worth it. A lot of people say not to take it as the battlefield is small enough, but without it the Harlequins would never have been able to reach the combats where they were needed as fast as they did. It would have taken an extra turn, which I didn't have. Without them the game would have been a loss, or at least a very sloppy victory.
For this game I elected to take a more unusual list. I decided to take things that I don't normally take to change the game up, and throw my regular opponent for a loop. Here's what I took:
Autarch on JB with lance and fusion gun
5 Shining Spears
10 Pathfinders
3x Vibrocannons (with a Embolden Warlock)
19 Guardians w/Starcannon (with an Embolden Warlock)
3 Jetbikes with a Destructor Warlock
Falcon with 6 Harlequins inside
KP: 8
I rarely take Guardians these days. I decided to take them today to be held in reserve, to come in later and claim back end objectives (the jetbikes were also designated in this role, but to claim mid-field objectives). I've never taken Shining Spears, and the plan was to have the Autarch lead them in glorious Marine slaying. I have never taken Vibrocannons either, and thought I'd have some fun with them. I've never taken Harlequins before, and I had to proxy them, but figured I'd run a Clown Car and see how it goes.
My opponent decided to take the Ravenwing. His plan was to match speed for speed, as I normally run a mechanized/jetbike list. His list was (as far as I can remember):
Sammael
8 Bikers led by Interrogator-Chaplain
8 Bikers
8 Bikers
3 Landspeeders with Multi-Meltas (not in a squadron)
3 Attack Bikes (not in a squadron)
KP: 11 (if the speeders and attack bikes were in squadrons it would be 7)
We rolled an annihilation game with a pitched battle deployment.
Eldar won the roll and elected to deploy first and take first turn.
I deployed my Vibro-cannons in a LOS blocking castle (a terrible looking thing but it’s all we got). They don’t need LOS to hit, so I figured I’d keep them safe. The Falcon and Spears were deployed behind them. Since I saw he had Ravenwing I knew I was safe from the biggest blast weapons, so I bunched them up tight. Finally, I placed my Pathfinders on the right in a ruin which ended up being a mistake. The Guardians and Jetbikes were held in reserve.
He deployed his bikes up front, then used his scout move to put his front bikes into cover. The Landspeeders and Attack Bikes were held behind cover. In the bike squadron were the Interrogator-Chaplain and Sammael.
All plans changed when the Dark Angels seized the initiative!
Dark Angels Turn 1
Turn one, Sammael turbo boosted toward the pathfinders, as well as the int-chap bikes. The attack bikes and the Landspeeders sped toward the Falcon, The attack bikes shot 3 multi-meltas at the falcon and scored 1 hit, which I saved with a cover save.
 (Yes that is a cooking pot in the picture. We're working on making better terrain. That pot will some day be the base for a planetary defense laser. I still have to put texture on my gaming table, hence the green felt.)
Eldar turn 1
After moving my Shining Spears forward to engage the Landspeeders, I moved the Falcon swiftly using Star Engines over to the beleaguered Pathfinders. In the shooting phase, I blasted my 3 vibro cannons at the int-chap bikes and slew 2 marines and wounded Sammael twice. In my second mistake of the game, my forward assault contingent (Spears and Autarch) were caught in the open because they destroyed a landspeeder in the shooting phase (thus they couldn’t assault anything since they weren’t in a squadron). Had they assaulted, the unit was big enough that I could have taken down two speeders (maybe). The Pathfinders attempted to wipe out Sammael’s last wound, but ten sniper rounds failed to do anything.
Dark Angels Turn 2
His speeders and bikes saw fast retribution by annihilating the Shining Spear unit down to the Exarch thanks to 5 multi-melta shots. The autarch was hit in this flamestorm but not wounded, as his bad luck with multi-meltas continues (it’s a running gag between us). On the other side of the board, the pathfinders suffered 2 losses from a flamer, while saving many bolter shots. Charging into the ruins, Sammael suffered a wound from dangerous terrain but saved it with his Iron Halo, however a fellow brother was not as lucky.

The retribution was swift. All the Pathfinders were wiped out without a single return casualty. The Eldar position was pretty tenuous, as they found themselves trapped!
Eldar turn 2
I couldn’t believe that I was completely trapped. Normally I’m the fast one. Recovering from the casualties, I destroyed 2 Landspeeders, 2 attack bikes and 1 regular bike. The Autarch, remaining Shining Spear Exarch, Vibro cannons, and reserves marching in (thanks to the Autarch for that one) claim credit for this victory. The Harlequins disembarked and took care of two bikers while losing one of their own.
Dark Angels turn 3
One reserve bike squadron rode on the flank and pulverized the Vibro-Cannon squad. All that was left was one gunner, quaking in his Eldar boots. The subsequent assault claimed two more Marines to Dangerous Terrain tests, but the kill point was earned.
On the other side, the harlequins wiped out all but the Interrogator-Chaplain, after which they safely disengaged, running for the safety of the Falcon.
Eldar Turn 3
The Harlequins embarked on the Falcon, which flew across the battlefield (Thank Vaul for Star Engines) to combat the new threat from the flanking bikers. The jetbikes formed a protective shield to prevent the guardians from being charged. The remaining Exarch charged the last attack bike to claim that killpoint, while the Autarch played cat-and-mouse with the last Landspeeder, failing to kill it as it shrugged off his Fusion Gun, and he couldn’t get a 6 to hit it in close combat. Finally, the Guardian squad killed the Int-Chaplain with a withering hail of Shuriken fire.

Dark Angels Turn 4
Bringing in the last reserve bikers, he surrounded the Autarch. The flanking bikers on my battle line charged into the jetbike squad. The marines took down one jetbike. The jetbikes passed their morale check unfortunately.
In the shooting phase, the Autarch shrugged off a hail of bolter shots, while the Exarch barely avoided getting fried by the last Landspeeder’s multi-melta (it failed to wound). The Autarch survived all the close combat hits from the Ravenwing bikers, only to fall to a powerfist.
Eldar Turn 4
The Shining Spears Exarch, not wanting to be a free killpoint, turboboosted across the field to hide behind a building. This was not an act of cowardice, but a brave and noble move. The Falcon dropped off the Harlies who charged the outflanking bikers. The Guardians consolidated their position and brought the Starcannon around to bear.
The Falcon exploded the last Landspeeder. The harlequins dispatched the remaining bikers, and consolidated into cover. All that was left was one Bike squad.
Dark Angels Turn 5
With only one squad remaining, he decided it was do or die. My opponent turboboosted them towards the foe, hoping to shoot up the harlequins on the next turn.
Eldar Turn 5
Lots of shooting from everything I had took out all but two of the bikers. Finally, the Harlequins sliced down the last two, ending the game via total annihilation.

Final Score: 11 KPs to 3
My thoughts on the game:
Well, I did learn a lot. Shining Spears are a tiny scalpel in an army already full of scalpels. While devastating on the charge (the Exarch alone wiped out 2 attack bikes and crippled a Landspeeder) they are fragile if the enemy can draw LOS to them. Of course, I left them out in the open and not much can survive a face full of melta. The Autarch underperformed. While he took down a Landspeeder, he also died without taking anyone down with him because his lance only works on the charge. I shouldn’t have chased down the speeder.
The Pathfinders however, underperformed. They didn’t inflict a single wound and were wiped out in a single round of shooting/assault. Their deployment was a mistake though. I should have put them in another building that was closer to the enemy. They wouldn’t have had LOS on the first turn, but it’s always better to spend a turn moving to get the perfect shot than to have two rounds of bad shooting.
The Harlequins were amazing. They wiped out three squads of bikes only taking one return casualty. Next time I am going to combine them with a Farseer. In a Falcon, their speed is unstoppable. Star Engines was worth it. A lot of people say not to take it as the battlefield is small enough, but without it the Harlequins would never have been able to reach the combats where they were needed as fast as they did. It would have taken an extra turn, which I didn't have. Without them the game would have been a loss, or at least a very sloppy victory.
Subscribe to:
Posts (Atom)
Related Posts:
