Showing posts with label Modeling. Show all posts

Friday, February 11, 2011

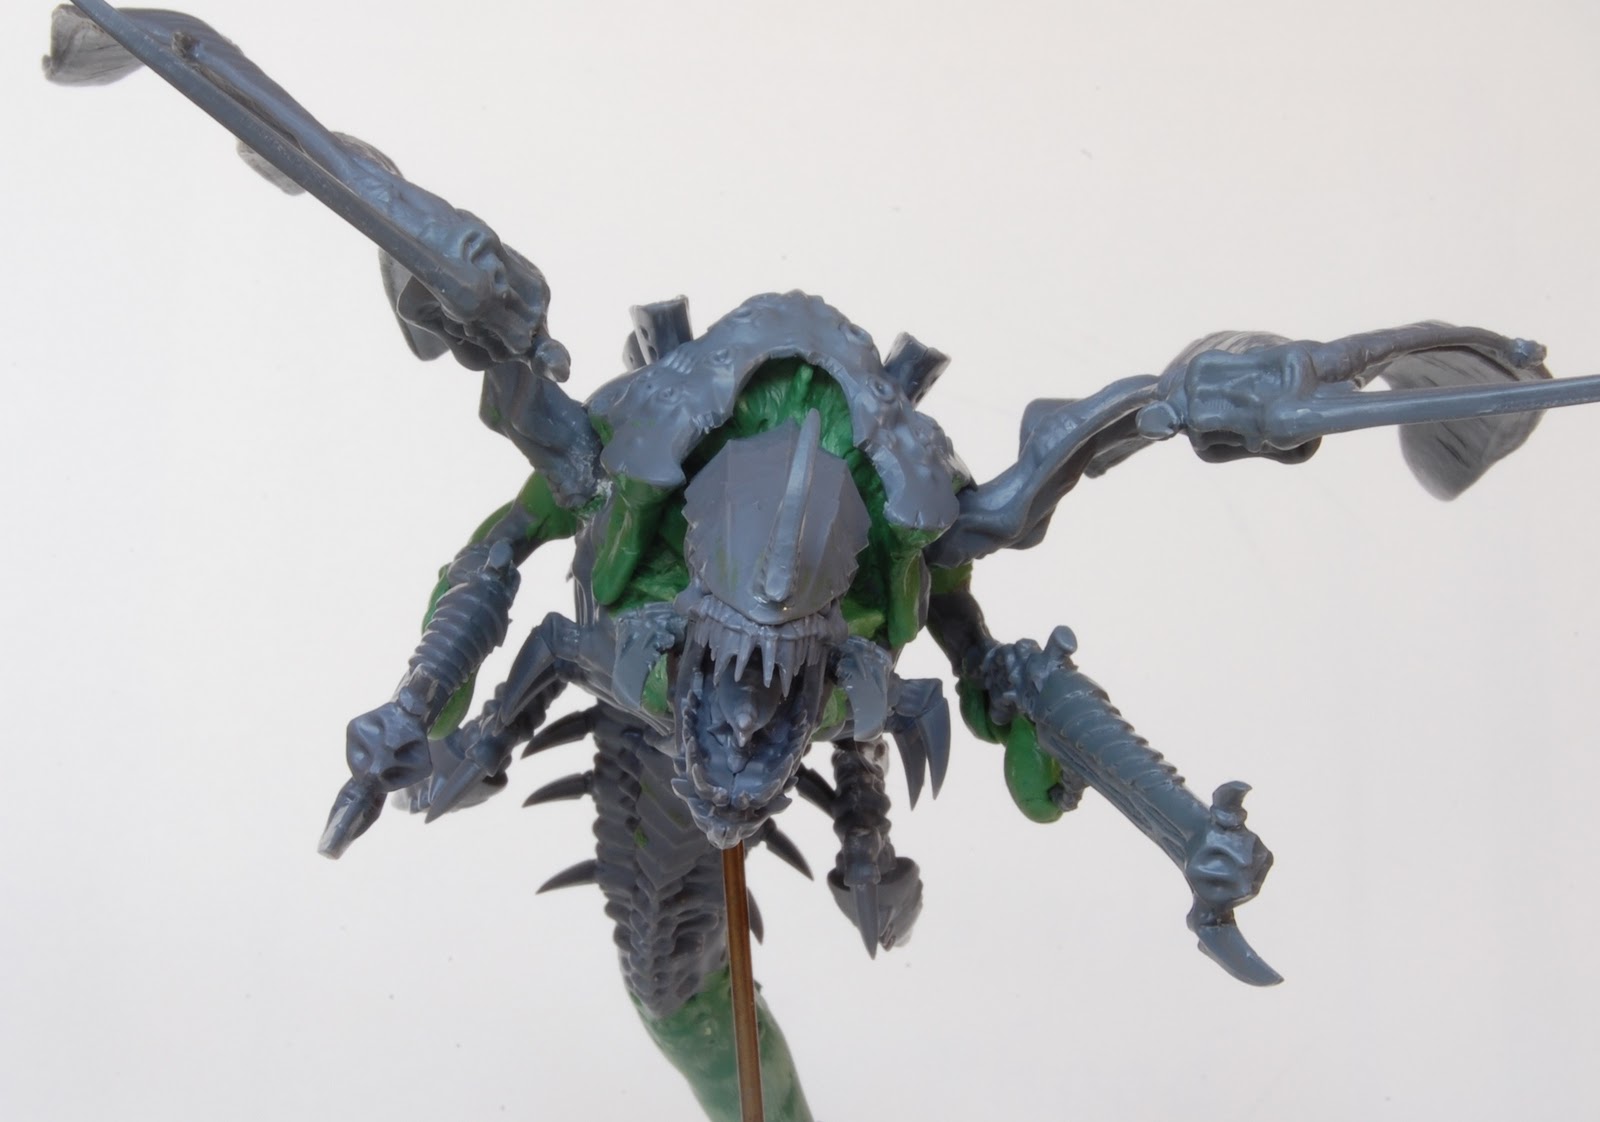
Tyranid Harpy Conversion

After months of this thing sitting on my desk it's finally done.  The most difficult part of this conversion was trying to make matching left and right venom cannons.  I'm still not satisfied with them, maybe I should have mounted them on the wings.  Oh well.  I'm not going to do any more work on it though.


Thursday, December 9, 2010

Swarmlord WIP

Here's my current Swarmlord.  The arms are magnetic so it can be a regular tyrant if I wish, I customized the tail to make him stand out a bit more and that weird double-tail thing in the codex picture doesn't do it for me.  I'm still not satisfied with the swords, I think they need some detail or more hollowing, I'm not sure which.  I'm open to suggestions on that.


Thursday, November 4, 2010

Tutorial: Magnetizing the Screaming Bell/Plague Furnace

Being a man of poor means, I have to stretch every gaming dollar I possibly can.  Furthermore, when new editions change some units drastically change in power level.  Just ask anyone who played Tyranids from 4th to 5th.  Ask them where their Carnifex arms are.  Mine are magnetic so I survived just fine.

When I got the Screaming Bell I was determined to magnetize it, no matter how hard it seemed.  It's an expensive kit and both options seem attractive.  I'm not experienced enough in 8th yet to know which is better and there is rarely a better teacher than experience, so I'm going to have to run both to find out.  I tried finding a tutorial online for magnetizing this beast but there were very few, and I knew I could figure out a better way to do it than the ones I found.

This may seem like a lengthy preface for a tutorial, but this is a seriously difficult project.  This is the hardest thing I've ever magnetized, even harder than the Trygon I did earlier.  First off, the kit is among the most complex I've ever put together.  The Doomwheel is difficult as well, but this one takes the cake.  It has supurb detail but also a ridiculous amount of surfaces and delicate parts.  I almost snapped several of the flame/vapor tendrils on the model while cutting them off.  This is not a kit for beginners (and there's a lot of beginners getting into Skaven because of the IoB, but that's a topic for another day).

What makes this kit so difficult is that the kit shares several pieces in either the Bell or Furnace assembly.  Compounding this is that most of these are key weight-bearing joins.  The yoke and arches are the prime examples.  The back platform being reverseable depending on what you're running is a simple fix but the arches and yoke will be the hardest part.  Steel yourself, double check your polarizations and let's dive in.

Above you can see all the different components of this magnetization.


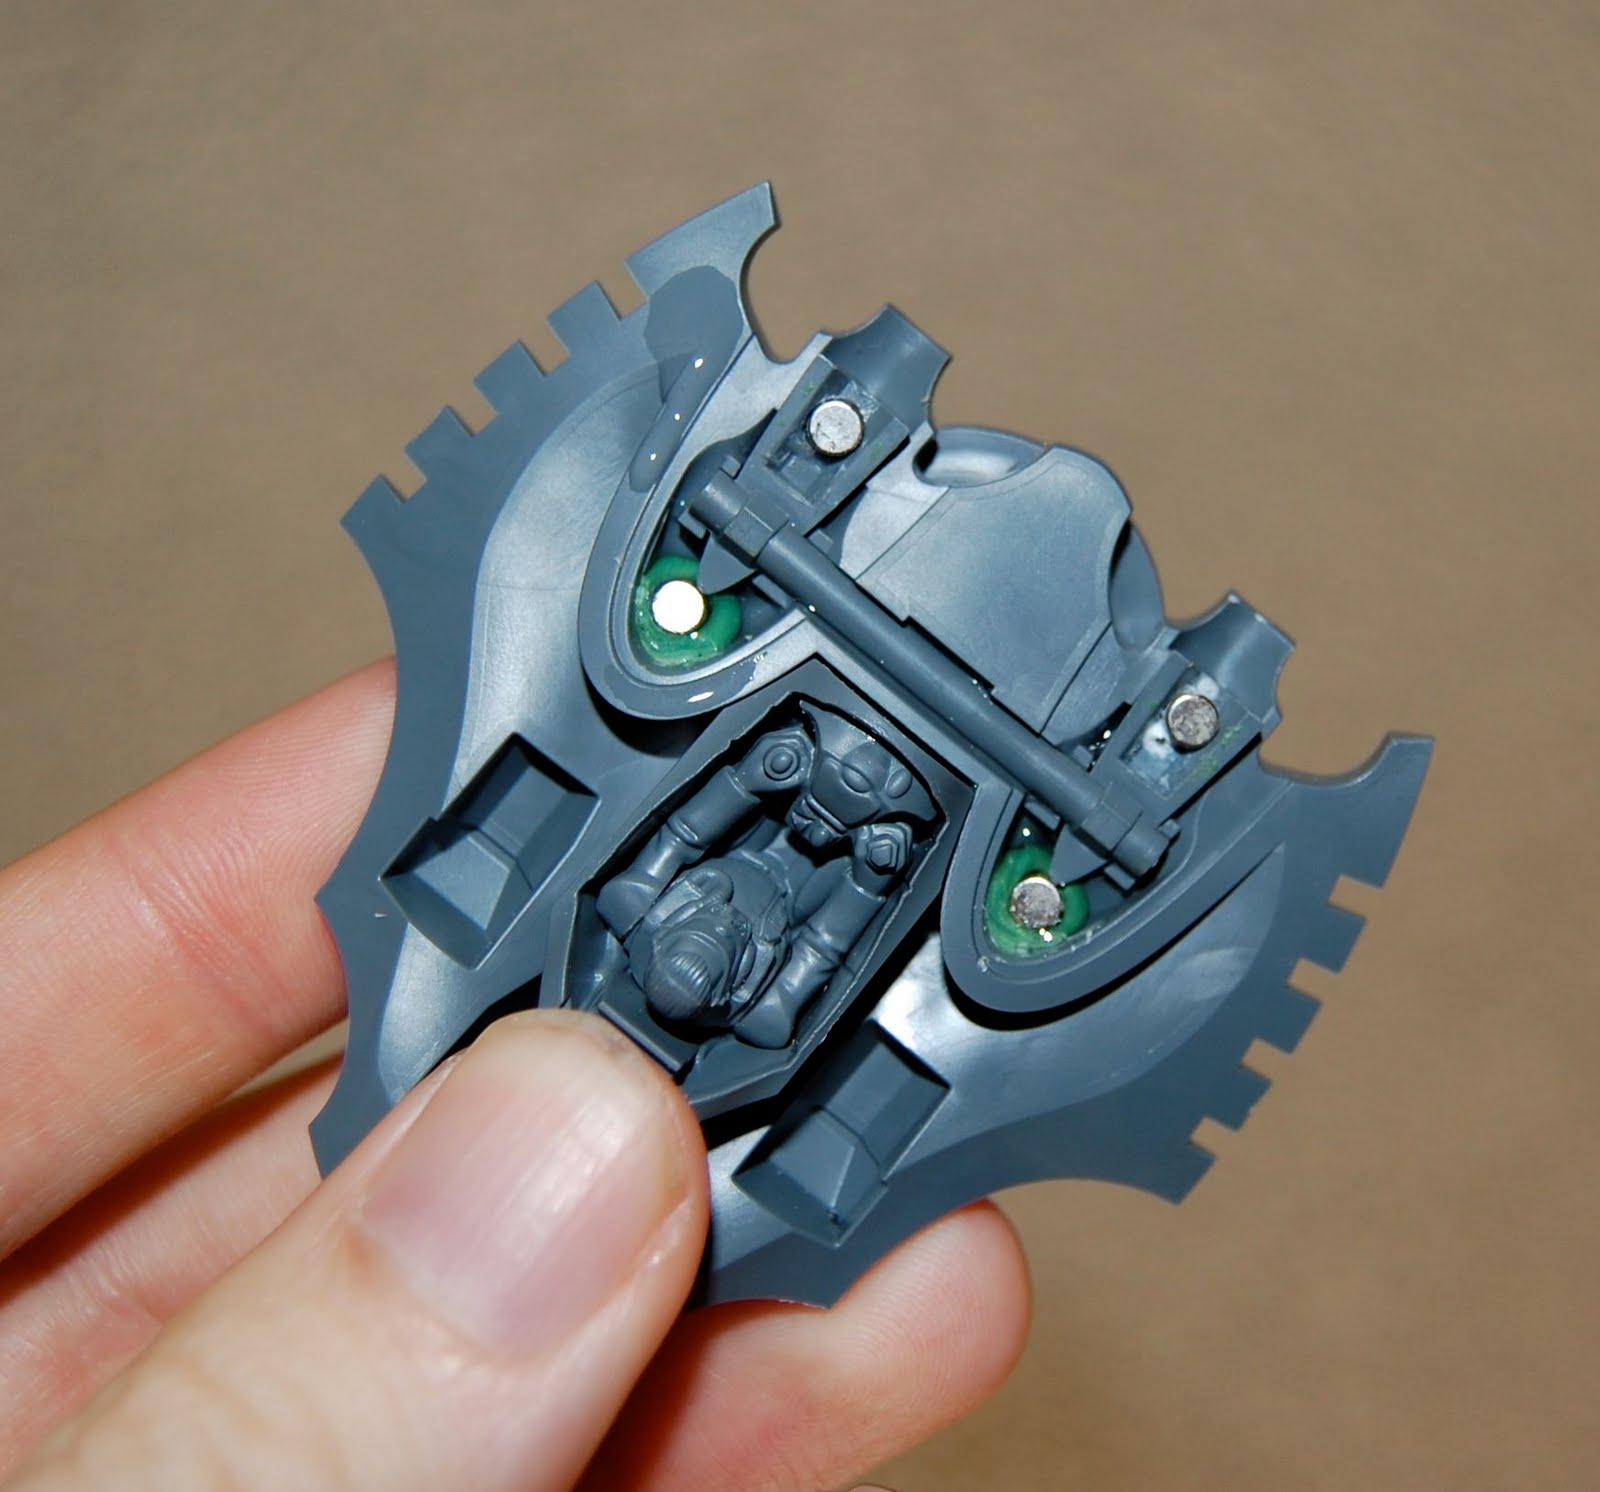
Let's get the hard stuff out of the way first.  Above you see the interior assembly of the arches.  The magnet is held in place with a greenstuff setting.  You want to use a small but powerful magnet.  This one is 1/8" wide, 1/16" thick and N52 grade.  In order to get the magnets in the right place, look below!


Glue a pair of magnets to either end of the struts.  Be sure that the glue has set, I usually reinforce it with a bit of epoxy.  When it sets, put some greenstuff in the arches and place another magnet on either end of the struts.  Widen the opening of the arches a tiny bit so that you can get the magnets in and out easily without breaking them.  Shove both ends in the arches so that the unglued magnet wedges into the greenstuff.  This way you know it's in the right place.  Double, triple check that your bell/censer is facing the correct direction because the arches must go in the correct side.  I messed up on this part twice and had to redo it.


Above you see the yoke.  Take two tiny magnets, the 1/16" ones are perfect.  Chop off a tiny, tiny bit of the ends and replace them with magnets.  They should still be the same distance apart as they were before.  This can be tricky, you should measure twice and cut once.


Before gluing the bell together, you'll need to get the Grey Seer in position.  Put him together except for the hand grabbing the bell.  Notice in the picture above he has the handle, do as I say not as I do.  I had fitted him, glued the hand and then taken the picture.  You'll need to properly fit him before you glue his hand.  Drill two holes in his feet next to the nubs that go into the corresponding parts on the bell.  Don't drill in the nubs themselves.  Put two small magnets in.


Place the Seer on top of the bell, put a drop of glue where you think his feet are, then drop a magnet in.  It will fall into the spot where the feet are.  The second one is trickier because the second magnet will want to go where the first one is.  Once you get both in and the seer stays up just fine, you can glue the bell together, and magnetize the Horned Rat symbol on top of both the bell and censer.


Now let's finish the Seer.  Very, very carefully drill into the handle on each side and place a magnet in each one.


You can't really see it in this picture, but I drilled a small hole and stuck a bit of paperclip in each side where the handle for the Seer meets the bell.  You don't need a full magnet, just enough force to help hold him in place as the feet provide most of the lift.  I then filed it flat and filled in the gaps so hopefully when it's painted you won't be able to see anything.


Now let's test it out.  Here's the censer assembly sans monks...


And here's the bell assembly sans Seer.  To attach this to the frame of the bell/furnace simply slide the pegs of the arches into the corresponding hole.  You can magnetize this part but it's firm enough that there's really no need.  I didn't bother.


Now the easy part.  Glue a powerful magnet on the underside of the front platform.


Put a magnet on the bottom of the brazier and the Plague Priest, be sure to check the fits and all that stuff.


The back platform is reversable.  It is not a weight-bearing part so I used a weird method to get it in.  Most of the weight is supported by the frame itself, I just wanted an extra bit of holding power without any visible point of contact.  I put two magnets in the sides and then added a magnet on the underside of the frame as seen below.


The magnets don't have contact but they still attract each other.


 To magnetize the Rat Ogre and Plague Monks to the platform simply widen the holes on the platform by a tiny bit so that you can fit a 1/16" magnet in.  To magnetize the Monks/Ogre, simply cut off the pegs on the feet about halfway so you have a flat surface.  Drill in a ways, then cut off the rest of the peg.  The hole will be in the right place and you can widen it for a 1/8" magnet.


Here it is as a Plague Furnace, missing the extra censer thing that goes on the arch.  I left if off because it's not necessary and I'd rather save it for other conversions.


Finally, here it is as the Screaming Bell.

Good luck!  I'll do it for you but I charge $100 for just the magnetization, and you have to clean the mould lines.  Yes, it is cheaper to just buy another kit.  That's the point.  I'm not doing this again.

Wednesday, July 14, 2010

Tutorial: Magnetizing the Trygon

The body is pretty straight forward, so I won't go into too much detail, but here's how I did the head and Mawloc spines. I used 3/16" magnets for the weight bearing joins, and 1/8" for the non-weight bearing.

Note that this is not the best way to do this. I glued two magnets into the bottom part of the head. You can see some drill scars from previous attempts. I then glued a paperclip bit to the front and back of the top part of the head. I carefully bent and cut the paperclip until it touched the magnets. The best way to do this is like the way I did on the Night Spinner, making a greenstuff setting and fitting the magnets that way. My way works, but it could have been better. I magnetized the jaw in this way, and the mandibles were really easy.


The body is pretty straightforward. Be sure to check your polarities. Each side needs to have the same polarity. The left and right can have different polarities or the same, it's up to you. I make them different.


Here's how I magnetized the Mawloc spines. I glued some 1/8" magnets into the inside of the body, and sealed them with epoxy. You don't want these to come undone and rattle around the inside. The magnets are powerful enough they'll hold the spines on even through the plastic. While the body is apart, drill and glue the arm sockets. You can reinforce the insides with epoxy in case you drilled too greedily and too deep.

Monday, June 21, 2010

Magnetizing the New Night Spinner/Fire Prism

Here's how to magnetize the new Fire Prism/Night Spinner kit. While my initial impressions of the Night Spinner were poor I'd still like to give it a try. I think its real strength will be on things like Thunderwolf Cavalry.

First off, I get my magnets from KJ Magnetics. They're a fantastic supplier and from my searches have the best combination of selection and prices. The exact type of magnets you use on this project really don't matter, as you can make any type fit the setting. I just used ones that I had left over from other projects.
The first step is to glue in your mounting magnets. Don't worry about the polarity of these, they can be the same or different. They need to be flush with the surface of the plastic, so you may have to drill a little. Don't drill into your finger like I did.

Drill out a wider and deeper hole than you need on the guns. The reason for this is that we'll make a greenstuff setting, and we need room to work. I used a 3/16 drill bit to make the hole.

Now set the gun magnet on top of the mounting magnet, and place a ball of greenstuff in the setting. There's two ways to do this from here. The first is to squeeze the two together and let the GS pick up the magnet into the setting and pull it out quickly (the fast but unreliable way), or to wet the top of the magnet so it doesn't stick to the GS, press in the magnet then pull it apart and wait for the GS to cure and then glue the magnet into the setting you just made (the slow but reliable way). Here I made the setting and glued it later, but on the Night Spinner guns I used the first method. Whatever works for you.

Here you can see the magnet in the GS setting. Make sure the GS fully cures before you go around testing it. I like to add a dab of superglue to the edges just to help it stay in place.

Fire Prism...

...and Night Spinner!

Okay, now for the housing. Here I used some GS to make a setting for the mounting magnet. Make sure it is far enough back that it won't get in the way of the guns. You can actually trim off the end of the guns (the part that goes into the housing) since no one will see it and it serves no functional purpose.

Use the GS to make a setting again. Since the housing doesn't bear any weight you can use a smaller magnet. You could even just use a portion of a paperclip if you wanted. Just be careful that you test the fit with the upper portion of the turret hull on or else the housing will not fit properly.

Here you can see all the housings magnetized.

Friday, March 26, 2010

A New and Improved Mycetic Spore

This update comes from my new computer! Here's another Mycetic Spore that I built last week.

This one looks kind of like the Saarlac. It's a bit big, I thought it would shrink more in the kiln but I was wrong.

It took me a bit longer to build this one compared to the first one. I still was really rough with the lines. I consider this one a rough draft, but I think this is the direction I want to take my spores. It's actually lighter than my first one and less fragile. I just have to figure out the sizing issues now. The next one shouldn't take too long to build as I know what I'm doing now.

Sunday, March 7, 2010

How To Chin-Mount a Shuriken Cannon on Vypers

The chin mounted S-Cannon is a great option for your Vypers. To keep my Vypers cheap I usually run dual cannons. Here's my solution for how to mount them without having to use expensive pewter Jetbike bitz, which I'm not even sure will work.  Plus, these are removable. 

The Vyper frame comes with two cannons, one on the weapons sprue and one on the Vyper sprue. The one we're going to use is the one on the Vyper sprue. It would probably work with the other, but it is built differently and I haven't tried using it.


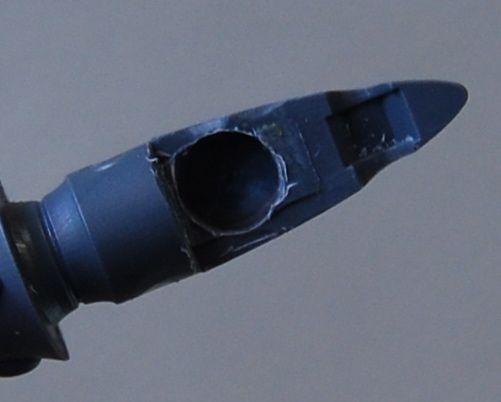
Here you can see in this terribly blurry photo (I took it on my phone, I was too lazy to get out my tripod and camera) what I've done. First thing you need to do is clip or saw off the ammo feed belt. Next thing to do is to saw off the back bulbous thing. Next, glue the bulbous thing at approximately a 20˚ angle on the rounded part. If you just leave it normal it won't fit underneath the Vyper.  Finally, glue the ammo feed belt underneath it all.  Lastly, fill in the circular hole with some greenstuff, and magnetize it for removal.  Not too difficult!

Monday, February 8, 2010

Tervigon Build Complete

3/4 of a tube of Green Stuff later, it is finished! I am certainly no Green stuff pro and it shows. That said, I still think I did okay for my first real green stuff project (the Master of the Ravenwing had some green stuff robes but that was hardly anything).


The termagants on the base are magnetic. They serve as wound counters. I am planning on having all my nids have magnetic wound counters on their bases. I have found that I have trouble keeping track of the many wounds, especially in multi-wound units.

I have begun painting it now. I wanted to turn it in for BOLS's contest, but my carnifex shipped a week later than it was supposed to so I couldn't finish on time.

Related Posts:

Related Posts with Thumbnails